Ingredients:
Stampin’ Up Painted Autumn Designer Series Paper
Brother Scan N’ Cut
Stylus tool
Brother Scan N’ Cut mat
Recipe:
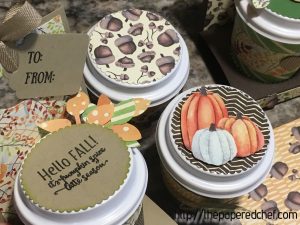
This video is a full demonstration on how to use the Brother Scan N’ Cut to cut out pumpkins from the Painted Autumn designer series paper. Prior to the demo, I tried cutting out the pumpkins in Black and White recognition mode and was not successful. Therefore, I changed to Color recognition mode for this tutorial. This mode took a lot longer to process but yielded better results. I also should have increased the color threshold because not all the leaves on the pumpkins were recognized and I didn’t realize that until they were already cut out. In this video, I demonstrate what the pumpkins look like when cut out with and without a border. In the last part of the video, I show you the results of cutting out cute little acorns using the Brother Scan N’ Cut. I also provide a sneak peek at the other papers in the Painted Autumn collection as well as many mini coffee-cups and other projects I created using this paper. Specific instructions for each project will be published on my blog so please check back.
Related Posts:
Coffee Break Suite by Stampin’ Up
Cutting out Pumpkins with the Brother Scan N’ Cut – Spooky Night DSP
Please visit my Stampin’ Up site to purchase products featured in this post. http://paperedchef.stampinup.net

Item Number: 144155


