In this Brother ScanNCut tutorial, you will learn how to create a stamping mask. You will learn how to cut out stamped images with your Scan and Cut SDX125. Instead of cutting them on paper, you will cut them on stencil material so that you can reuse your stamping masks. The stamp set used for this tutorial is Merry Moose by Stampin’ Up! This stamp set is in our 2019 Holiday Catalog by Stampin’ Up! I shared tips and tricks on how to cut out the moose in this set. Then, I demonstrated how I use the moose stamping mask to create a herd of moose.
Settings for SDX125
Blade Depth = Autoblade
Speed = 3
Pressure = 7
I also shared several holiday projects I created using the Merry Moose stamp set. One project I created used another stamping technique called Northern Lights. It is pictured below along with a link to the tutorial which inspired me. A full list of supplies is listed below.
Product List


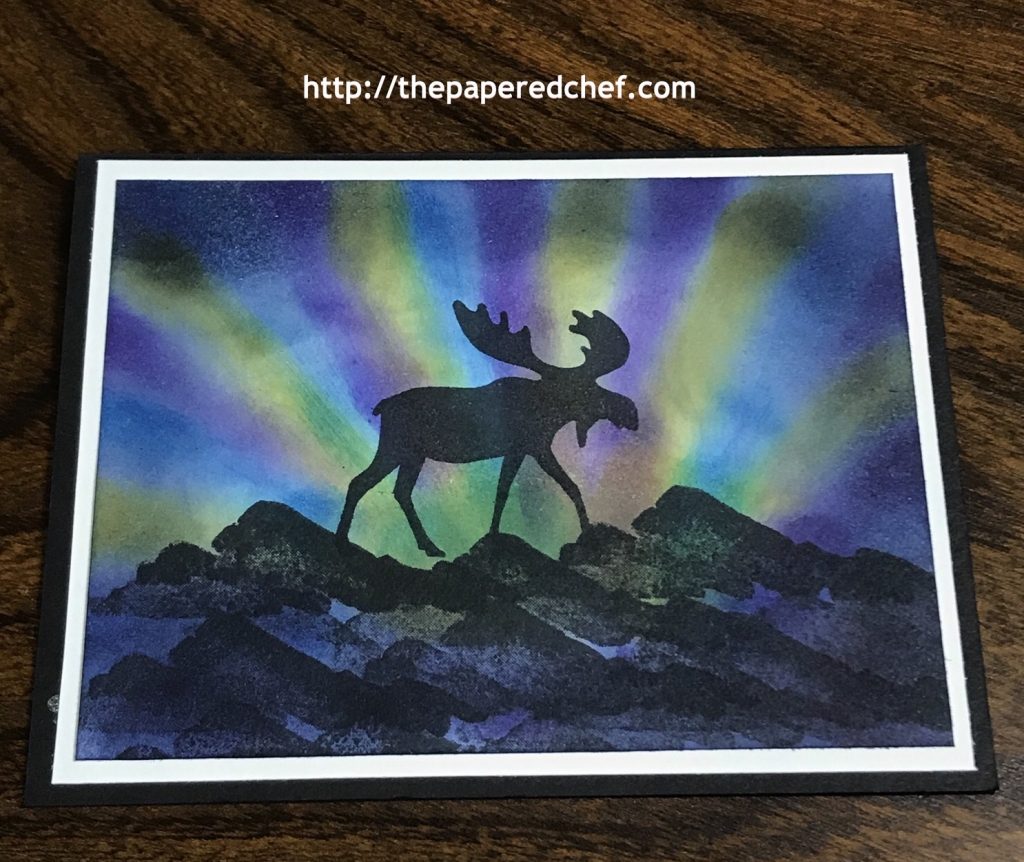
Northern Lights Technique
Projects by The Papered Chef:
Subscribe to my YouTube Channel
Visit me on Pinterest
Like me on FaceBook
Follow Me on Instagram
Shop at our Etsy Store


