Ingredients:
- Santa’s Workshop 12″ X 12″ (30.5 X 30.5 Cm) Specialty Designer Series Paper
- Santa’s Workshop Memories & More Card Pack
- Santa’s Workshop Enamel Shapes
- Stampin’ Trimmer
- Stampin’ Pierce Mat
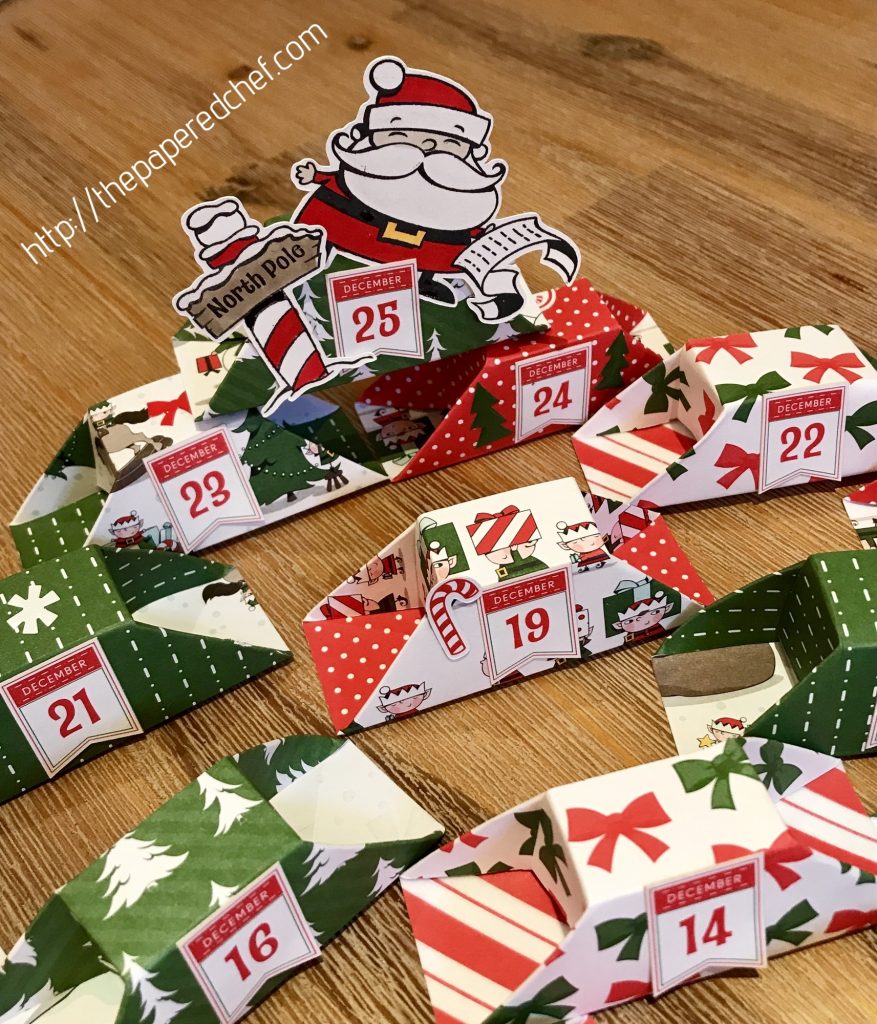
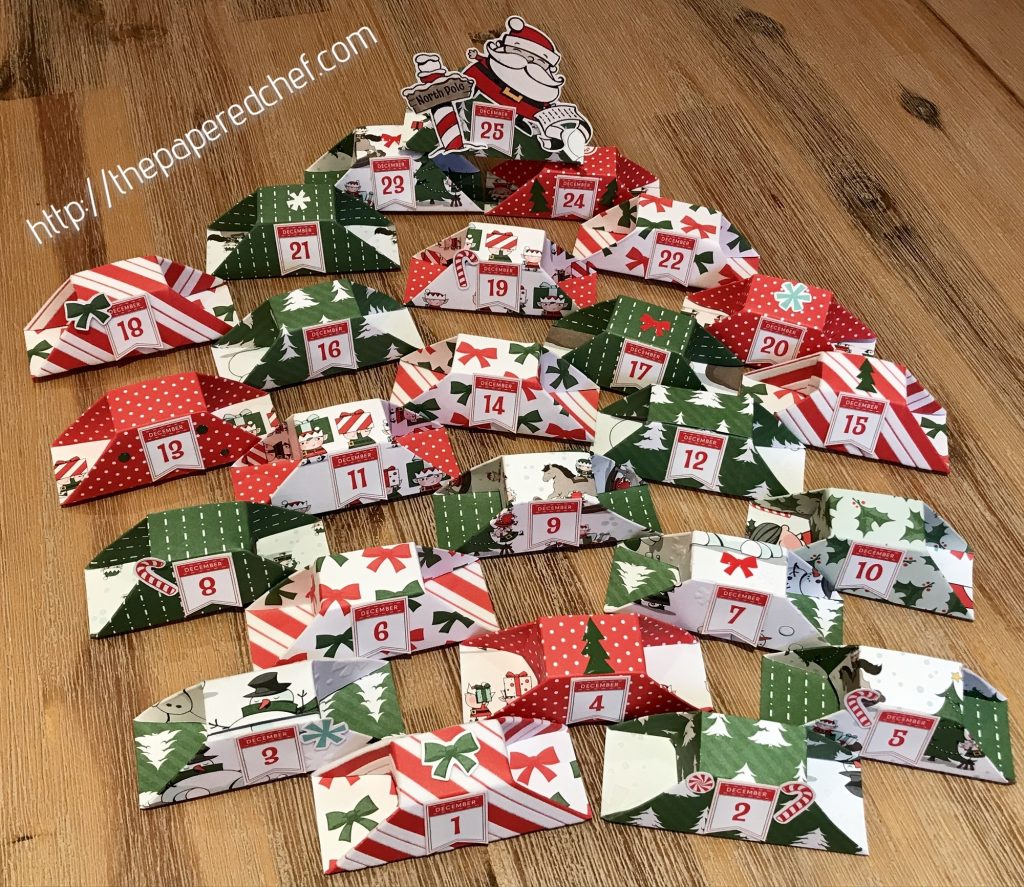
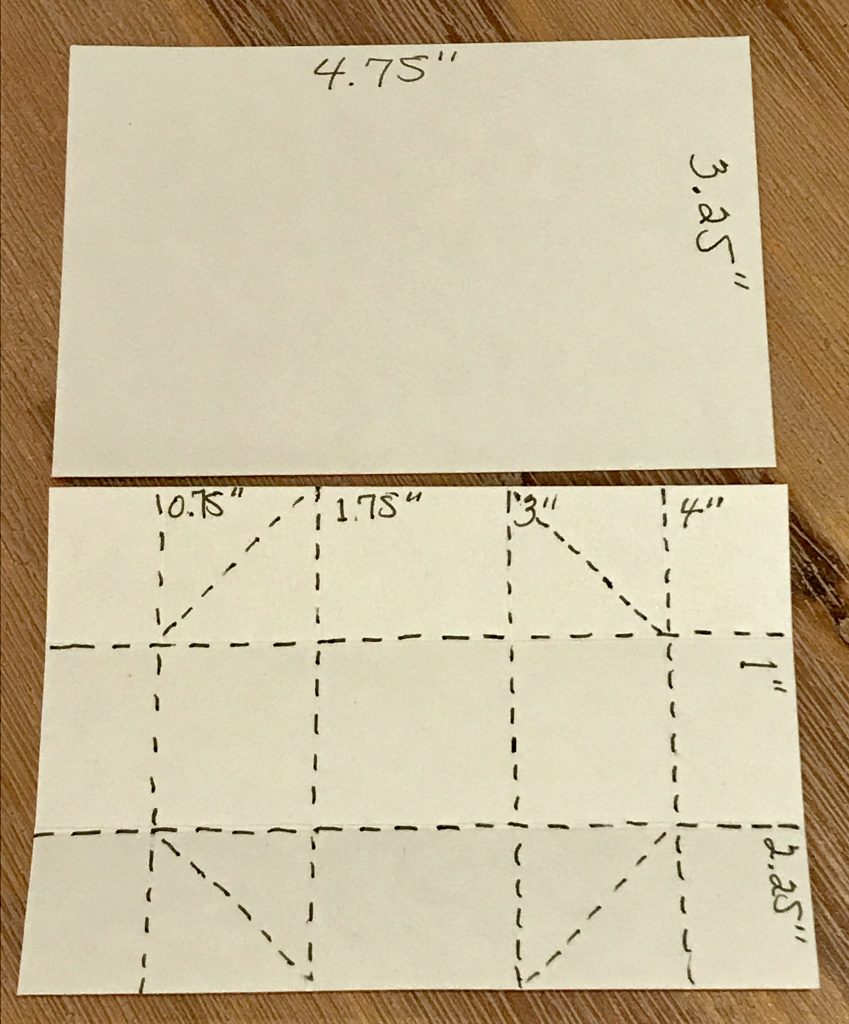
In this video, I demonstrate how to create this Advent Calendar or Countdown to Christmas project using the Santa’s Workshop designer series paper by Stampin’ Up!. The Santa’s Workshop suite of products is featured in our 2018 Holiday Catalog. I demonstrate how to cut, score and fold the dsp. Then, I show you a template so that you can write down the dimensions. Then, as reinforcement, I create another box so that you can see how I finished my calendar project. I also share tips on many of the candies which will fit inside of the little trinket boxes. The great thing about these boxes is that they stand up on their own and no glue is needed for assembly. I apologize for saying 2.5″ when it should be 2.25″. That is exactly why I made the template so that I could keep it all organized in my mind. Please use the template below. When making your diagonal lines, it is good to use a ruler or piece of card stock so that your lines are straight.
Product List:
 Specialty Designer Series Paper")


More Projects by The Papered Chef:


Very cute – where did you get the calendar dates from?
Hi Char, sorry I missed your question before. Stampin’ Up! quickly sold out of these packs. I got the stickers for the dates inside of the Memories & More card packs. http://www.stampinup.com/ECWeb/ProductDetails.aspx?productID=147905&dbwsdemoid=2166056