Ingredients:
Stampin’ Up Designer Series Paper
We R Memory Keepers Punch Board
We R Memory Keepers Pinwheel Attachments
Paper Straws
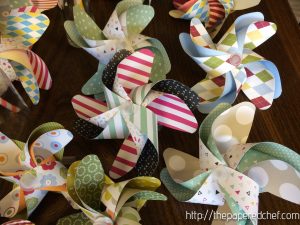
Recipe:
Cut two squares for each pinwheel. The pinwheels in this demonstration use 4”, 5” or 6” squares. You can use 3” to 12” squares for pinwheels but I don’t recommend the 3” ones because the paper is too small to work with. Decide which patterns you want to show the most. One pattern should be on the top and the other on the bottom (see video). Then, punch holes in the two papers. The papers need to stay on the same side up where you punched the holes. Those holes are used to line up with the punch board. Use the guides on the punch board to poke a hole in the middle and four curves in each paper. The left side is for the paper which will go on the front layer of your pinwheel and the bottom paper is for the paper which will go on the back layer of your pinwheel. Assemble as instructed on the package. There is a demonstration in the video. There are a couple of ways to assemble them but just be sure that you put the straw on last, after the plastic pieces snap together so that it doesn’t get bent. Please use the following links to order a pinwheel punchboard and attachment kits. Thanks for visiting.